Tuesday, July 28, 2015

What's Lurking in Your Clothes Closet?

Before I arrive for the first organizing session with a client, I tell them,

"Don't pick up anything before I arrive!" 

Every single item tells a story and if they move it, there's a possibility that it will continue to cause problems for them as we didn't have it to work with from the start.

So, of course this is not how the closet looked.

Empty

It looked like this.

Full
Shoes piled vertically and...cleaning supplies?
Hiding Squirt from the kids - good idea, but not in a closet.
And this...
What you see is what you can reach...the doors not able to open as they are blocked
by 2 large nightstand tables.

The goal was to get all of the client's clothes, including outerwear!, shoes & boots, purses, and accessories in this one closet thereby emptying out 2 dressers and getting all of the scattered shoes off the floor.  

The client was a bit skeptical, visualization helps.

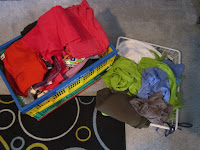
First we gathered all the clothing; outerwear, hats, mittens, tops, bottoms, skirts, pants, dresses, scarves, belts, undies, socks, workout wear, gardening clothes, and all the shoes, boots etc.  

The bed makes a perfect sorting "table", just be sure to cover it with some sheets first to protect your nice bedding.


Let the keeping begin!  Remember, only keep what brings you the thrill of joy!  Hold it and ask yourself, will you want to wear this again next season? Do you love wearing it?  

Focus on what you want to keep and discard the rest.

If it still has the tags on it from the store, cut them off and make the garment yours.

Discard anything that A. you don't love and B. inspires guilt (spent too much money) or fear (afraid a relative will be upset).  

Visualize looking in your closet first thing in the morning and loving everything you see! So many beautiful choices, they all fit, feel good, are in good repair and make you feel happy!  

Donate or throw out the rest.


Check every pocket...you might find this!


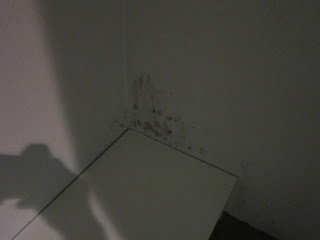
But we also found this...uh-oh...mildew.


We sprayed bleach on it, then wiped it clean and did a quick paint job with Kilz to finish it off.  Just in time to move all the clothes back in.  (The client did find the source and fixed that too.)

The keep pile is much smaller (hopefully), and everything is off of the floor, including the shoes.

We were able to utilize matching containers from other closets by switching some things out.  I encourage clients to use what they have on hand!

We rolled or folded clothes to stand them up in the large totes and then labeled them by category:  socks, underwear, bras, shorts, work out tops, work out bottoms, gardening clothes, etc. (Of course the socks are folded!)

The totes are labeled as is their place on the shelf.  So easy for the client to pull them all out to put away laundry and then place them right back where they belong.

On the left side we hung coats, jackets, fleece, sweaters, dresses, pants and skirts and after removing those bulky nightstands (and replacing with a sweet little oak table that the client had in another room), dressy tops are hung on the top right side and casual tops on the bottom right side.  Belts are hung on a hook just inside the door and scarves and gardening clothes are in the white totes on the left shelf.  Jeans are folded in a neat pile.

Boots were placed in plastic shopping bags and stored on the very top shelf to the left along with handbags, and all the shoes were placed on the bottom shelf - nothing on the floor!  

Voila!  All of the client's clothes, for all seasons, well organized in one visually pleasing space.  


There are still some minor tweaks to be made....changing out to velvet hangers which eliminate clothes slipping off... and placing shoes inside shoe boxes (always keep your original shoe boxes, they keep your shoes dust-free) 

But what is most important, is that the client was thrilled!  Here is what she had to say about the experience.

"Here is how I feel now:  more peaceful, empowered to do more rather than overwhelmed, positive, encouraged, motivated to do more organizing, energized, helped to do more for myself, educated on tricks I did not know, wiser to know how long a project should actually take (much longer than I would expect if I count the hours I put in apart from your time), excited about how this will spill over into my family's spaces.  And I also feel like I understand myself better.....what I like and don't like, and how when things don't feel right, I am not able to focus.  Wow, if everyone could get to that point, what could they accomplish?  How would their lives be different?  It's an amazing thought, isn't it?"


What's lurking in the back of your closet?

What is the feeling you have when you get dressed in the morning?

*All pictures and testimony used with permission.  

Wednesday, July 22, 2015

Jewelry Storage

It's come up in casual conversation and with clients this week, "What's the best way to organize jewelry?"

The best way is the one that works for you.

We all dislike untangling chains, playing "Eye Spy" as we match up tiny earrings and have felt the dismay and regret at finding jewelry that has broken or bent from being piled in a box.  

There is a better way.

Sorting out to see what you have is the first step.  Invite your children to help you, it can be satisfying to share the stories behind each piece.  I recently gifted a set of pearls to my neice that has been in my family for 6 generations!   

Focus on what you'll keep first. 

  • Keep everything that makes you happy; that looks great on you, that makes you feel wonderful. 
The size of this pile may surprise you!  


  • Keep the sentimental.  

I confess I have a large gold chain necklace with a huge gold cross outlined in rhinestones (think Mr. T), that I've only worn once.  My youngest gave it to me for my birthday one year when he was quite small and I remember wearing it to church (hoping no one would comment - it was so not my style), but loving the way he lit up when he saw me wearing it. I hope I'm buried with the thing.


  • Keep it if you love it, but will never wear it, but only if you'd like to make something out of it or if you plan to gift it to a relative or friend (but be sure to ask if they want it first), or you make an appointment at the jeweler to have it repaired.

I happen to have a lot of jewelry kept from my teenage years; little 4-H pins, lots of orphan earrings that I adored etc.  I plan to make a little ornamental wallhanging with them, as they make me smile.

Keeping what you love first, makes the discard process much easier.

Set aside all the bent, broken gold and silver chains and the missing earrings.  Do not throw them away.  If they are real gold or sterling, they could be worth some $$$$.  I had a job buying gold at one time and some women I waited on, literally had a small fortune of unwearable jewelry stashed in their jewelry box!  It's hard to tell what's real, so leave it to the professionals to decide.

Donate everything else.  

Now let's organize!  To me jewelry can be art.  It is colorful, beautiful and can be appreciated all of the time when it's on display.

One DIY idea I've used myself, is to repurpose an old picture frame or bulletin board and hang jewelry within it; either on hooks or tacks.


This idea is even simpler and more beautiful and would work especially well if all of your items are neutral and natural in color.

You can order this on etsy

But, if simplicity is your aim and you've got enough art on the wall or want to reduce the visual clutter, this might be the perfect solution.
Ice cube trays!
They easily fit into a drawer, they can be stacked and no dust.  Pick some up at a thrift store today!

BUT...
  
I couldn't resist showing just one more creative idea from the internet...this is so tempting to make.

Beautiful!

What do you store your jewelry in?

What is your most sentimental piece of jewelry?

Were you surprised by the size of your "keep" pile?


Wednesday, July 15, 2015

Closet Clean-Out

I set a goal this week to tackle this mess of a basement closet that I showed off last week.


This closet contains art, office and school supplies, sewing materials, craft stuff, WIPs (Works In Progress), boxes of photo CDs and other memorabilia, and an 8 year collection of Suzuki piano music, books and materials.  My objective was to sort out all of my art & sewing stuff and move it to my art studio and hopefully purge and relocate the rest.  A girl can hope right?

From basement to attic - sounds easy enough.  I set aside a few hours one afternoon.

First I moved everything upstairs to the living room floor.  It's important to take things in stages; pace yourself, go get a big glass of water.  This might take awhile.


To start things off right, I set up 3 bags:  White (to donate), Black (to throw out), Paper (to recycle).  I use different colored trash bags because...

Have you ever thrown out something perfectly wonderful that you were saving because it was in a black trash bag?  I have (sigh).  

The end result!

Sorting is the first step.  My preference is to sort out everything by category and purge as I go.  It can be challenging to remember to sort and purge.  No need to keep anything that you aren't using, just because it belongs in that category.  Someone else might love it!
These are the items I kept that were relocated.
                              
                  Photos & Memorabilia
Supplies for  our college students


Musical memories


I also started a pile for all the items that I'll move to my art studio...you'll see that soon. This took care of all of the loose stuff.

But, I still had to deal with all of these containers FULL of stuff!


I have to admit, I got a little misty-eyed sorting the piano music and remembering all those years of helping my boys practice; all the lessons, the competitions and their devoted teacher.  (Yes, I'm keeping all of this for their future lives.)

Sorting can be emotional work!

So I took a break...breaks are necessary when doing hard work.  I ate a bowl of delicious red raspberries and sat outside and smelled the flowers for awhile.


Then it was back to sorting...
Look!  More stuff for my studio!
More office supplies for the college students
The "To Donate" pile got bigger...
Who remembers stick-on letters to make signs?  I am dating myself.
The items for my art studio grew too.


Lots of empty containers - such a good feeling.  Save containers until the house is organized. They really come in handy.


Finally, all done!  The basement closet is completely empty and below is the stash I kept for my art studio.  I was happily suprised to find many projects that need finishing (as well as starting), so I am excited to have everything I need in one room. Now to find a home for it all!


Now, I've learned over the years that  some families collect wine or art or books...

Not mine!

We collect writing utensils!
At least our college students will be well-stocked.

What hidden collection is lurking in your closet?


Wednesday, July 8, 2015

Craft Room Clutter


One of the perks of being an almost-empty-nester has been to reclaim our finished attic, previously a playroom, then a teen hang-out space, then storage and remake it into my own art studio!  

I painted the space in blues and grays to match the carpet and give it a dreamy feel.  I look over the trees and rooftops of our neighborhood and the space reminds me of the sky on a cloudy day.  It is my favorite retreat when it's raining and when it's sunny, the light pours into the windows.

For years I have carted my supplies upstairs and downstairs to create/sew/craft on our dining room table and then, so we could eat, carried it all back and put it away in the various rooms it was stored. Maybe you can relate?

This is only some of my art stash... 


Messy art closet
My fabric stash
Sewing notions - yes that is a toolbox!

I continue to work on relocating many items in the attic to other places...my oldest son's collections...the "take to college" pile for my youngest son...my husband's life archive...my scrapbooks and memorabilia and various other stuff that no one knows quite what to do with.  So, I'll be showing the before and after photos once the transformation is complete. For now, there are quite a few piles of boxes around the perimeter of the room. 

Patience is a virtue.

In the meantime, what to do about storage for all of my art stash items?  I happen to love old things and so Ikea was out.  Instead I  thrifted a couple of cool pieces of furniture at The Beldenville Flea.

Rusty  and stained top of the cabinet

This dingy Army issue card file cabinet was being used for automotive and electrical parts.  The first step was to clean it all out.  

Time to put on the gloves!
Look at all the cool stuff inside!  My husband kept quite a bit of these items as the fuses were exactly the ones we needed for the garage.  It was like a treasure hunt although I could have done without the mouse nest...yuck.


After scouting around the Flea for awhile, I came across this old oak dresser that seemed the perfect height and width to put the card file on.  It's even on wheels!


It was badly stained and the original ornate drawer handles were missing.  In the past I wouldn't have dreamed of painting good wood furniture, but as Myquillan Smith, aka "The Nester" from The Nesting Place, recommends, if you hate it anyway, why not paint it?  

So I did.

But first, as it was all coming apart, I glued it all back together using wood carpenter's glue, then I sanded all the gunk that was stuck to the top and I used this product to make the drawers slide easily into place.  (I'd never done anything like this before, thankfully bloggers are in my friend group.)


I primed it and then used up some floor and porch paint that I had laying around.  This color reminds me of the ocean.  I purchased sleek new modern drawer handles and lined the drawers with contact paper from Target.


This pattern brings to mind all the little stones one might find on a beach, it seems so perfect in my nature inspired space.

Then on to the card file cabinet!  

I chose the sun as my inspiration and picked out a golden shade of yellow spray paint to match and went to work.


Here it is in my attic space...but it's not done yet!


The inside of many of the drawers were rusty and stained from water damaage, so that contact paper came in handy and adds so much fun to the cabinet.


I also painted all the drawer dividers...now to organize and label them.  (They are the same shade of yellow and that contact paper is white not blue..who knows what happened here?)

The final touch was to add the labels.  I used my own handwriting!


And now...


The missing drawers created space for my origami paper, large rulers and beads.

I used this product for organizing my beads. The plastic containers have lids that screw on and off and 12 of them fit into their own plastic case.  Perfect for seed and bugle beads.


Let's review!  

BEFORE....


AFTER...
Wall stencils courtesy of Alabama Chanin
I do believe this is Pinterest worthy!

What I haven't mentioned was the fact that I didn't buy the card file initially...it was more than I wanted to spend, so I went home empty-handed. The next morning I felt convicted that I was meant to have it, if it was still there.  I drove back to the Flea and there it was sitting in the rain...just for me. The vendor who took my $ told me, that instead of an impulse buyer, I was a "fate" shopper.  I loved this compliment!

This prescription bottle I found inside one of the drawers sealed the deal.

The last 4 digits of the phone number are the same as mine!

If you could repurpose any space in your home, what would you do with it?  What would you put in your very own card file cabinet?